Using Scratch Jr to introduce coding to KS1
What is Scratch Jr?
Scratch Jr is a free app (iPad & Android) that is designed to introduce young children to the basics of coding, supporting the delivery of computing curriculum objectives. It’s the younger sibling of the more advanced Scratch 1.4, Scratch 2 and the most recent edition, Scratch 3.0. In my opinion, it’s the best app available for introducing coding to students in KS1 - and it’s free. Brucey bonus!
Why use Scratch Jr to teach coding in Key Stage 1?
Scratch Jr is a brilliant way to introduce young learners to coding.
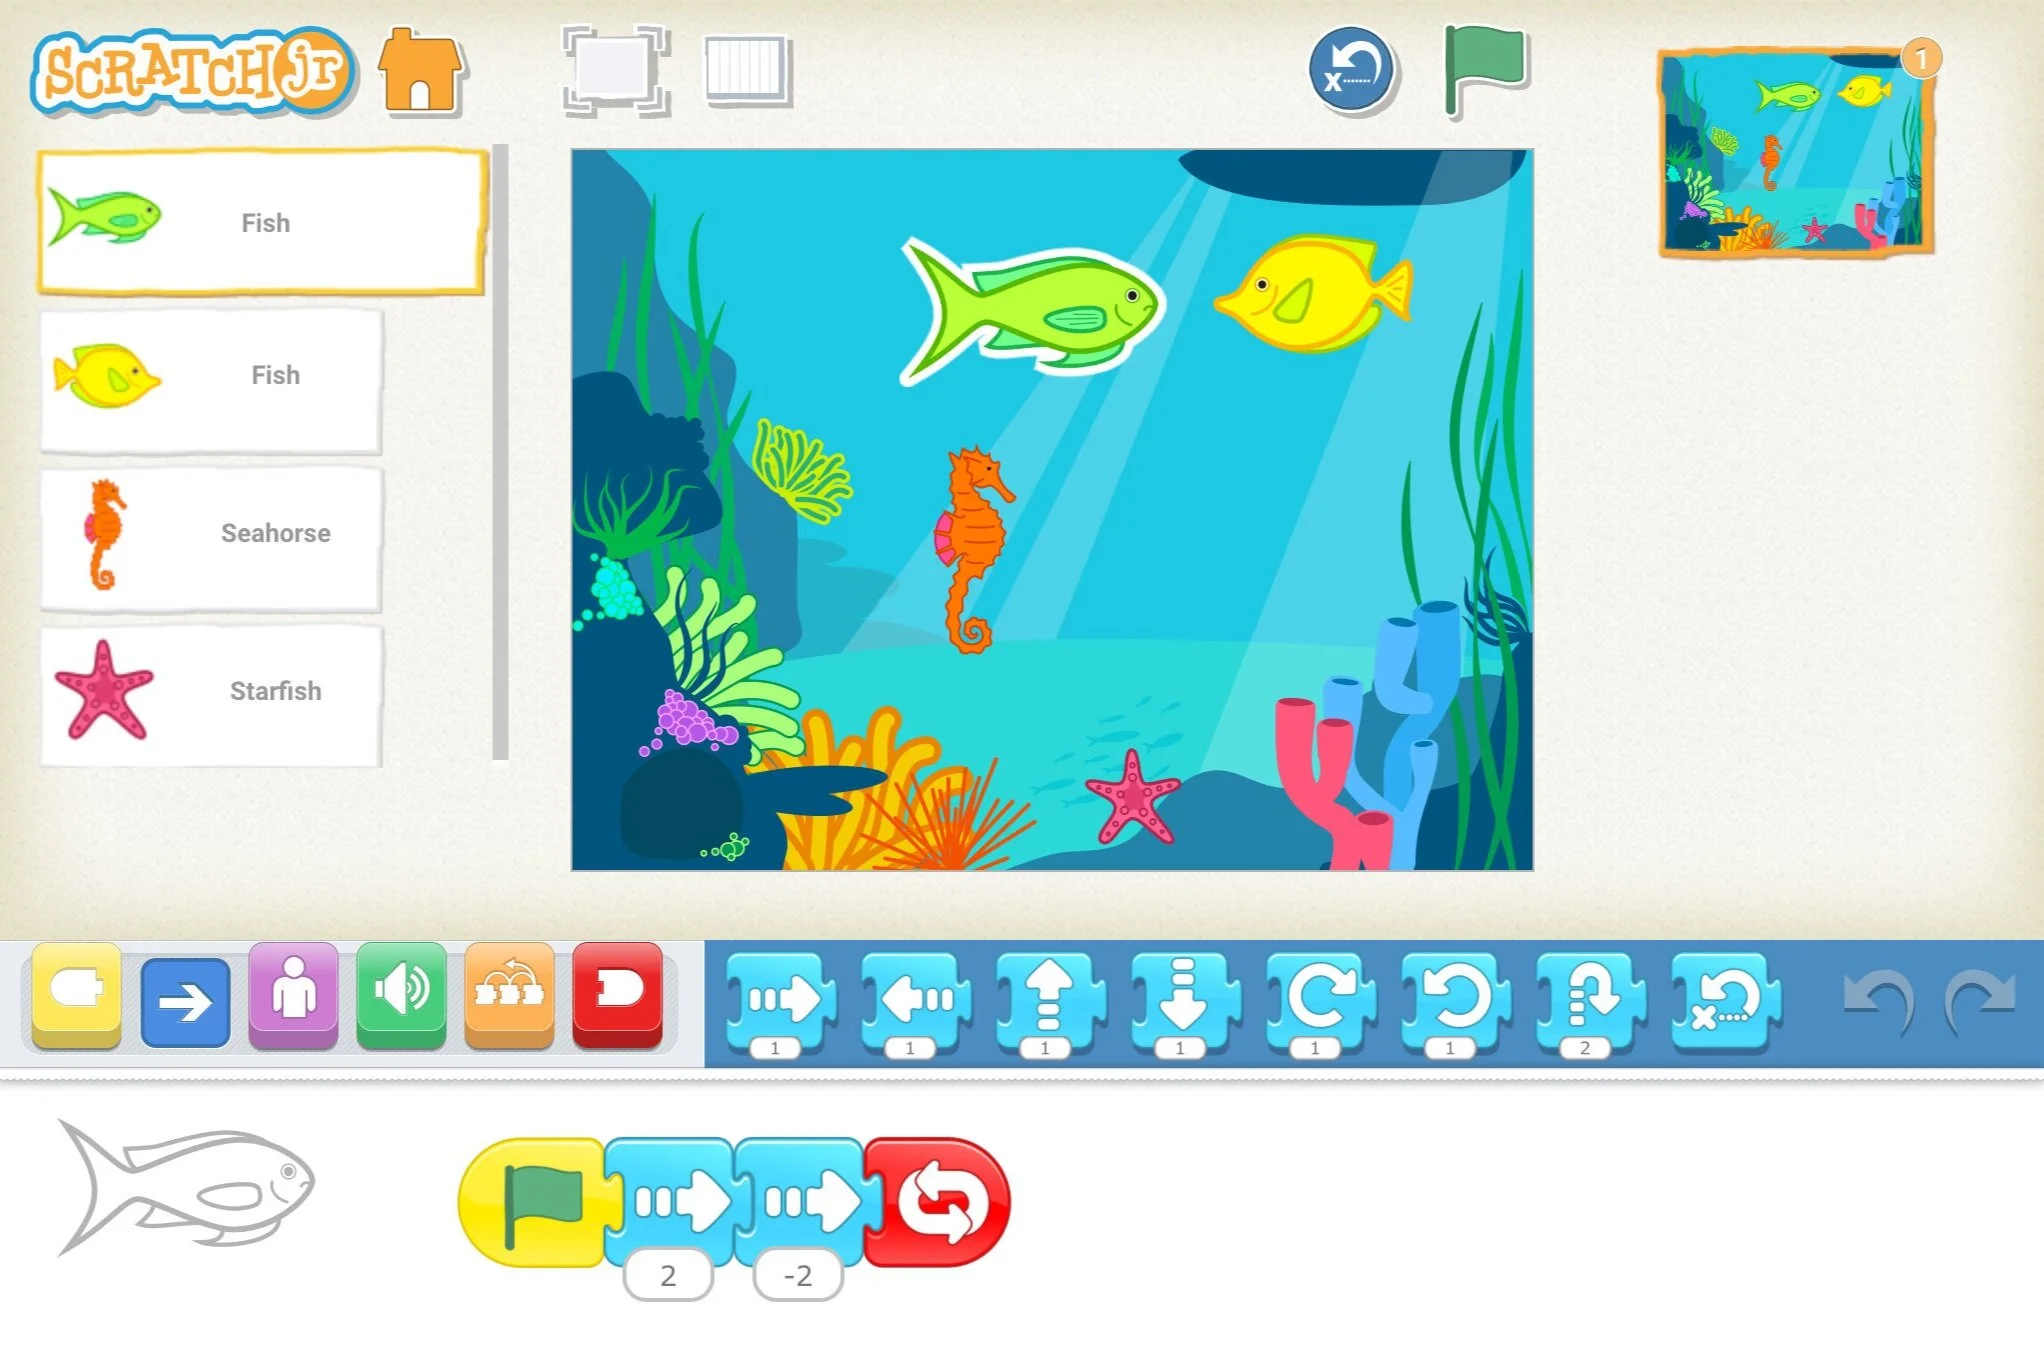
Coding is achieved through connecting image-based blocks.
The beauty of Scratch Jr is its simplicity. Children use a range of image-based blocks to instruct characters/objects (known on Scratch as sprites) to move and interact on screen. This image-based block approach means its accessible to EAL, SEN and non-readers; so all abilities can access and achieve computing curriculum objectives with Scratch Jr.
Rather considerately for teachers, the app comes with some great free resources too that we’ll link to in this blog. If you’ve never taught coding before or lack confidence delivering the subject, Scratch Jr has a help button which takes you through to eight simple starter projects, each demonstrating how to use the different functions of the app. It might also be worth viewing the interface guide provided by the makers of Scratch Jr.
Each sample project teaches a new skill and those skills are reapplied as children progress through each project. Here is a very quick summary of what each sample project teaches users:
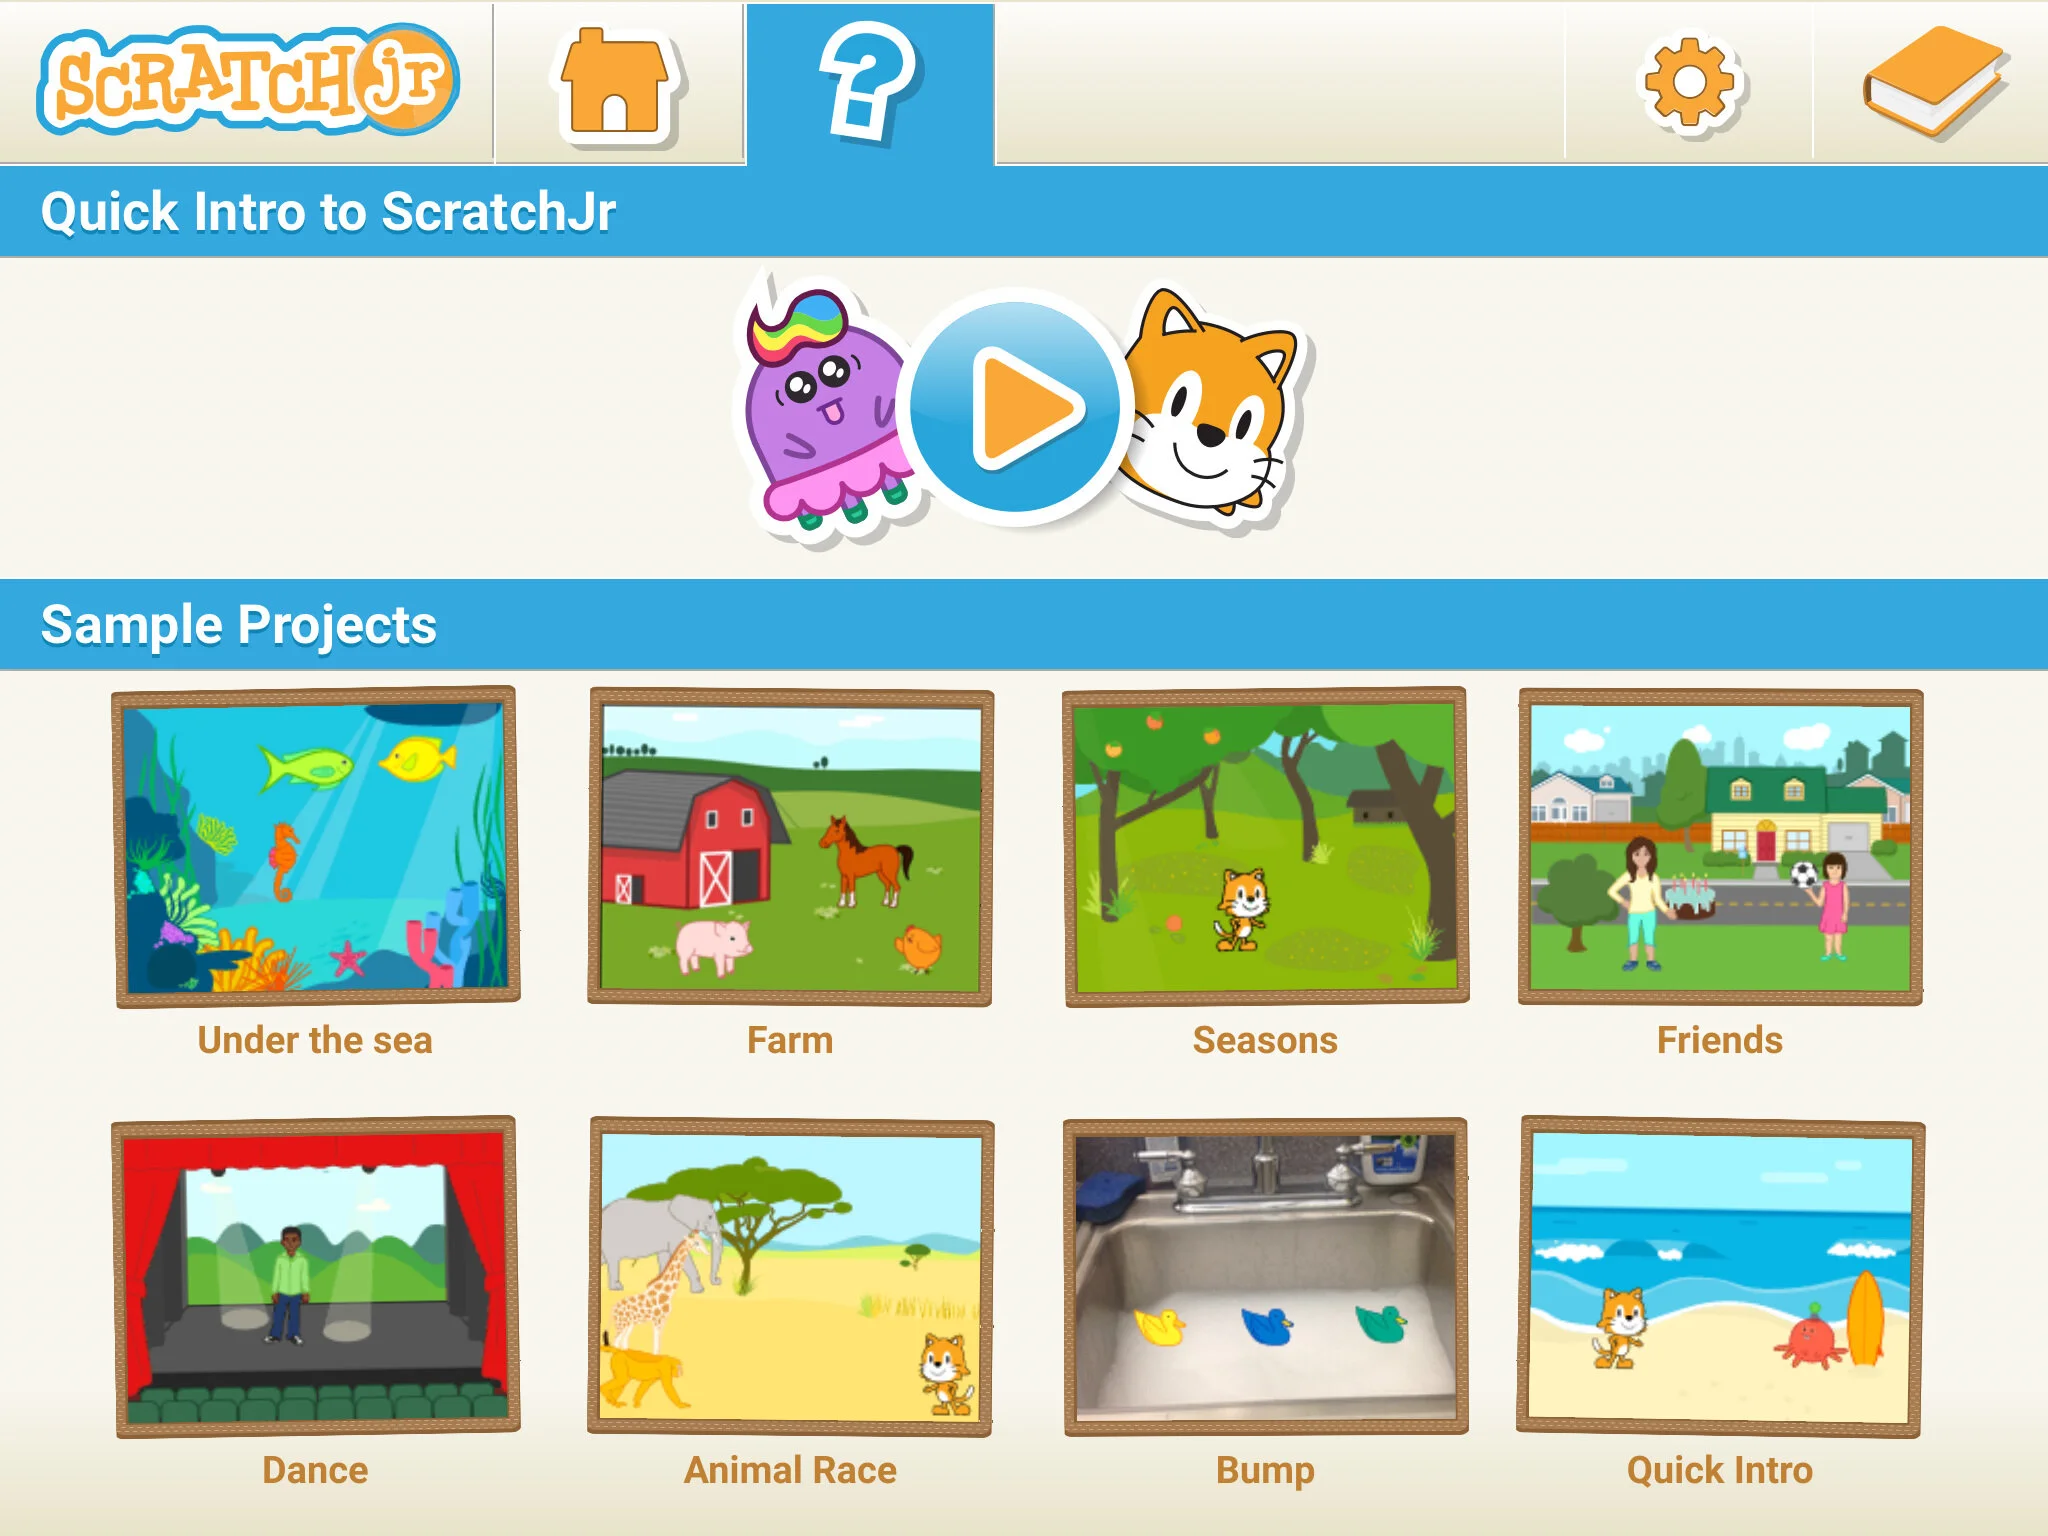
Sample projects help guide users through various coding features on Scratch Jr.
Under The Sea - how to make sprites move left, right, up, down, jump and repeat the algorithm (instruction) forever.
Farm - how to interact with sprites by tapping, record and play sounds, and use a loop to repeat a sprite's movements
Seasons - how to make a sprite wait according to a timer, and how to code the background scene to change
Friends - how to introduce text speech conversations between sprites
Dance - how to grow, shrink and hide sprites.
Animal Race - how to set sprite’s speed (slow, normal, fast) and use ’send’ and ’start on’ blocks
Bump - how to make sprites react to one another when they touch using the ‘bump’ block
Quick Intro - brings all of these skills together.
What might a first lesson with Scratch Jr look like?
I’ve had the pleasure of teaching this lesson in many schools and have found it a great way to introduce the very basics of Scratch Jr, before going on to doing the sample task projects. The children pickup the key concepts quickly and all students are able to experience success (at various levels) in their first attempts at programming.
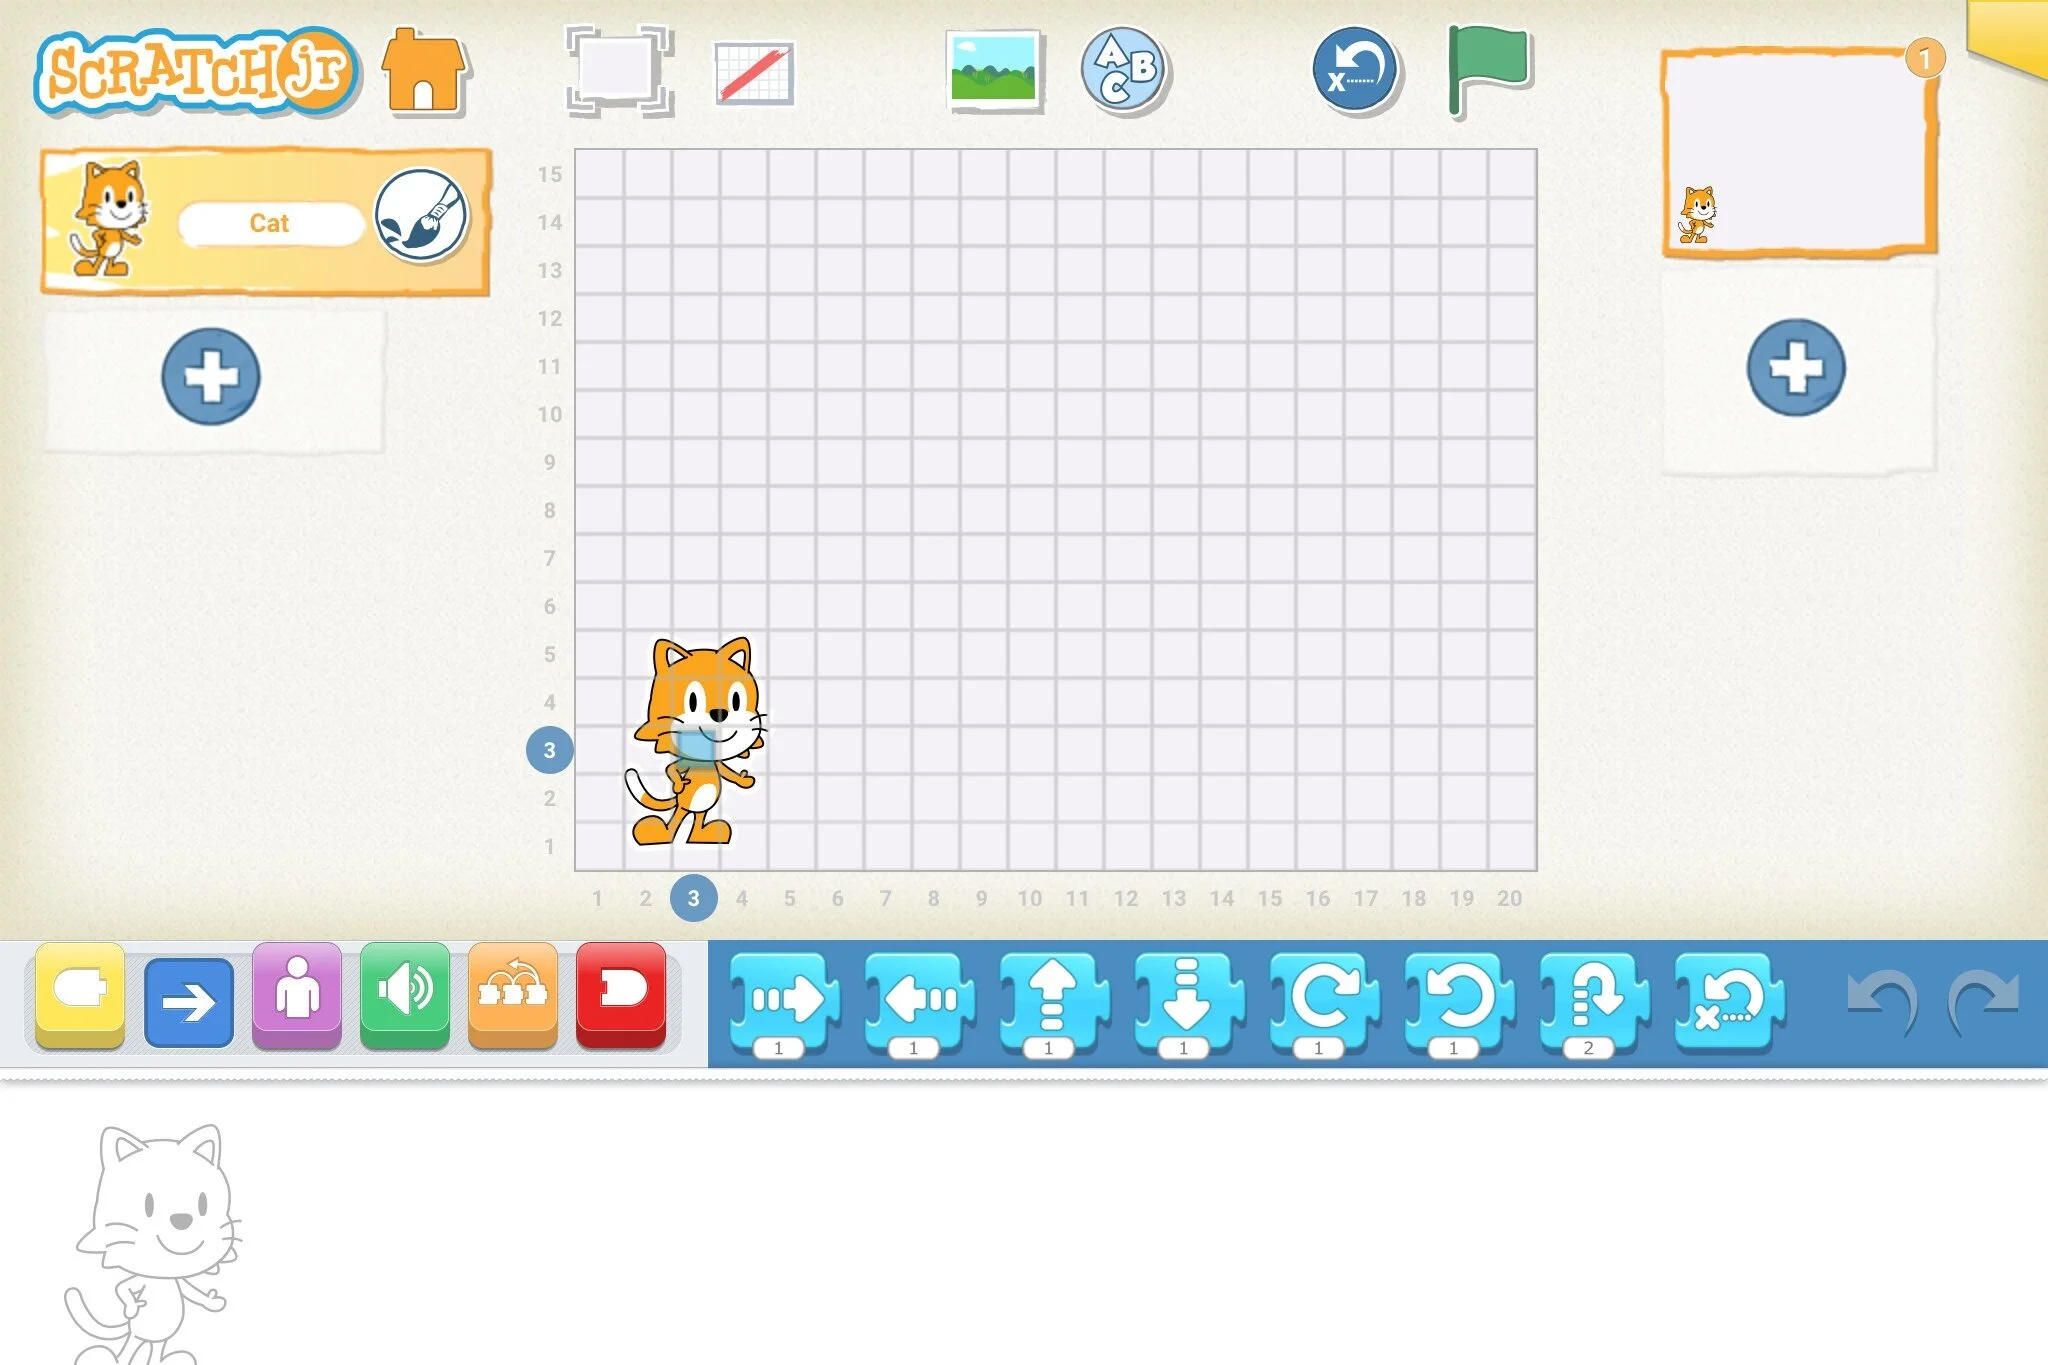
The grid view helps students to make more informed decisions about how to code distances.
There are some useful features within Scratch Jr that will help support learners with their coding. The first to mention and one I like to introduce early on is the grid view (show screen shot). Tapping this button to turn on grid view places a grid overlay 15 x 20 squares over the images on screen. It also provides numbers along the x and y axis. This feature is great for showing students how maths links to coding, and how they can apply their knowledge of number to make accurate and efficient algorithms.
After my students have learned how to move their sprites, I like to challenge them to set their sprite to a specific coordinate (let’s say 3,3) which is shaded blue. I’ll ask young learners to move their sprite to the coordinate given and model I'll it on-screen by dragging the sprite to (3,3). As a quick side note, I use a lightning to VGA or lightning to HDMI connection or AirPlay to model for the children on a larger class screen, rather than attempting to show what I’m doing by holding up a small iPad screen.
Students can be challenged to make the most efficient algorithm to achieve the given objective.
Here’s my process for teaching first time Scratch Jr students how to make their sprite move with efficient code:

Extend pupils by getting them to add new blocks into their sequence at each checkpoint.
Ask 'How can you tell the sprite is in the correct starting place (3,3)?'
Ask 'If we wanted to move our sprite from (3,3) to (7,3) on the grid, which coding blocks would we need to use?'
I’m looking for students to experiment by dragging their character and identify that they need their sprites to move to the right using the ‘move right’ block. They’ll also need to identify that they need a ’start on green flag’ block at the beginning.
Instruct students to move their sprites back to (3,3), add a ’start on green flag’ block and then add their choice of move blocks to get their sprite to (7,3)
At this point I observe how students attempt to move their sprite from (3,3) to (7,3) and I commonly see the following:
Some students place one ‘move right’ block after the ’start on green flag’ block and tap the green flag repeatedly until their sprite lands on (7,3). This works but is very inefficient.
Other students workout that they need to use more than one ‘move right’ block so add four ‘move right’ blocks after the ’start on green flag’ block, then press the green flag. This works better but isn’t the most efficient algorithm.
There are also opportunities here to discuss maths links and use number sentences to show why they needed four 'move right' blocks because 7-3=4 or counting on from 3 to 7 makes 4 jumps. This approach will mean students will have used 5 instructional blocks to achieve the desired outcome.
The brightest students will add a single ‘move right’ block after the ’start on green flag’ block and change the number underneath the ‘move right’ block from 1 to 4. This is the most efficient algorithm for the task as it uses only two instructional blocks to achieve the desired outcome.
We discuss all of the approaches students have taken and talk about which approach is the best or most efficient and why.
Now I challenge the students to work with a partner to make the most efficient algorithm that gets their sprite from (3,3) to (18,3), then to (18,13), followed by a movement to (3,13) before finally returning to (3,3) - all in one motion by clicking the green flag. I display this information on the board and model the pattern of movement by dragging the sprite on screen to show my expectations.
Ask the students to press the ‘reset’ button after every click of the green flag to get their sprite back to the correct starting position again. Discuss and show why this is important. What happens if they forget to reset and then press the green flag? How does that affect their algorithms?
When children go away to take on this challenge, I personally like for them to experiment freely without me interrupting them or interfering with their problem-solving. It’s quite common for one pairing to discover how to get from one coordinate to another successfully, and then start sharing what they have learned with others on the table. I personally love this discovery and peer sharing approach and it works particularly well in this session.
To extend any students that move through this task quickly by creating efficient code that achieves what I've asked them to, I instruct them to add different actions every time the sprite gets to a coordinate checkpoint. So for example, when the sprite gets to the first checkpoint at (18,3), I want him to jump, and when it gets to (18,13) the sprite needs to rotate, or shrink, or grow etc and so on. This gets students thinking about how they need to order and sequence their blocks and also gives them an opportunity to explore some of the other blocks available to them in Scratch Jr.
The rest of the session is very much time dependent but getting the students to follow up what they’ve learned by creating their own versions of the sample projects is an excellent starting point and will have students confidently coding very quickly.
How can teachers retrieve learners’ Scratch Jr projects?
Apple Classroom (Blog post about this coming soon!)
Airdrop - get students to name their files and save their work using the yellow button in the top right-hand corner and editing the text field accordingly. Select the ‘parents’ tab and if needed support the students to correctly answer the mathematical problem presented to them. Select ‘Share by Airdrop’ and get students to send their file to your device. Voila!
Scratch Jr Project Ideas
After your students have completed the sample projects it’s time to extend their learning by getting them to apply it to different contexts in new projects. Here are a few cross-curricular ideas that I’ve implemented in class:
Try the official projects by Scratch Jr (https://www.scratchjr.org/teach/activities)
Create a gymnastics routine with one or more sprites
Create a Scratch Jr Maze game using ‘bump’ blocks
Create a Scratch Jr animation (for example, a sprite travels to the moon by launching in a rocket - might include scene changes)
Tell a story in Scratch Jr (characters move, interact, have dialogue etc between each other)
Make an animal fact file (show animals moving in their habitats, include sounds and have characters use dialogue to give facts)
Create an animated birthday/Christmas card
Animate the telling of a joke
Create an animated profile about yourself (use the camera to create your own backgrounds and sprites with children’s faces).
Create a musical instrument (for example, draw the different components of a drum and code each sprite to make a sound when tapped)
Code a firework show
If you have any suggestions to add to this list, please leave a comment below.
I hope this blog has been useful. If you have any further questions about using Scratch Jr to teach KS1 coding, please drop me an email using the contact form and I’ll get back to you ASAP. For schools in the UK, if you’d like to book me to come to your school and deliver this session or any of our school workshops, please get in touch.
Happy teaching!
Antony Hyett